วันนี้จะมาแนะนำวิธีเปลี่ยน Port ของ Remote Desktop ใน Windows 10, Windows 8.1 และ Windows 7 ซึ่งปกติจะค่าเริ่มต้นจะเป็น Port: 3389 โดยเปลี่ยนเป็นตามที่เราต้องการ เพื่อหลีกเลี่ยงการแฮ็กหรือการโจมตีจะผู้ไม่หวังดีผ่านช่องทางของ network ช่วยลดความเสี่ยงลงไปได้อีกระดับสำหรับคนที่เปิดใช้งาน Remote Desktop
วิธีการเปลี่ยน Port ของ Remote Desktop
- ทำการเปิด Run โดยกดปุ่ม + R ที่คีย์บอร์ด แล้วพิมพ์คำสั่ง regedit ตามด้วยกด Enter

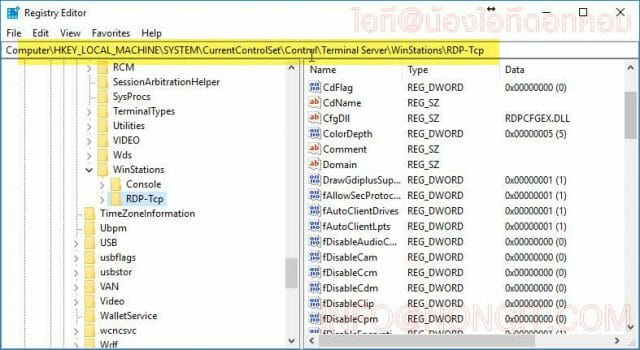
- จากนั้นที่หน้า Registry Editor ให้เปิดไปที่ HKEY_LOCAL_MACHINE > System > CurrentControlSet > Control > Terminal Server > WinStations > RDP-Tcp
- ที่ช่องทางด้านขวาให้คลิกขวาที่ PortNumber แล้วเลือก Modify
Sponsored Links
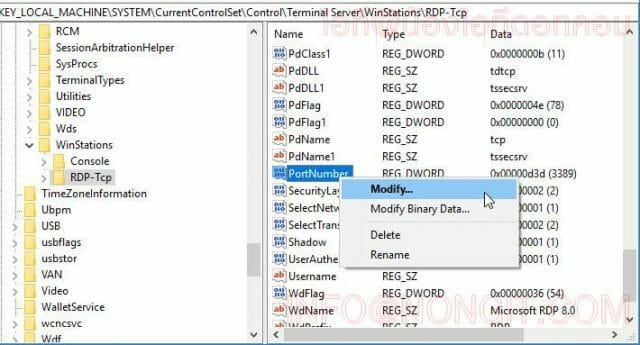
- ให้เลือก decimal แล้วทำการกำหนด Port ตามที่ต้องการ โดยต้องมี 4 หน่วยและต้องไม่ซ้ำกับ Port อื่นๆ เสร็จแล้วคลิก Ok

- ปิดหน้าต่างทั้งหมดแล้วทำการ Restart เครื่อง 1 รอบ
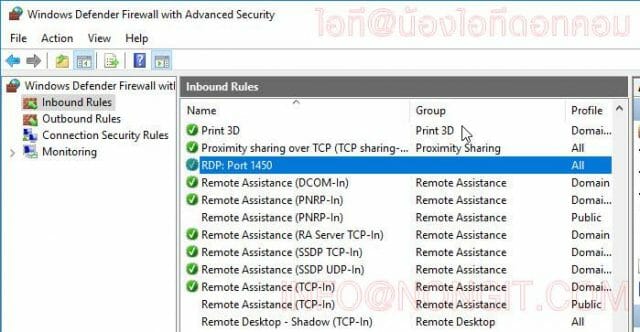
- เมื่อเครื่องเปิดเรียบร้อยก็ให้ทำการ เปิด Port ที่ส่วนของ Firewall ของเครื่อง เพื่ออนุญาตให้สามารถเชื่อมต่อผ่าน Port ตามที่กำหนดได้ โดยสามารถดู วิธีเปิด Port ใน Windows Firewall ได้ตามลิ้งค์
- เมื่อเสร็จแล้วก็ลองทำการ Remote เข้ามาโดยใช้ ip address:port ตัวอย่าง 192.168.1.20:1490

ขอบคุณข้อมูลจากเว็บ www.nongit.com